


How to Choose the Type of Tattoo Needle for Different Tattoo Effects
Introduction
Choosing the right tattoo needle is fundamental to achieving professional results and creating the exact effect you envision. Whether you're working on fine line details, smooth shading, or vibrant color packing, the needle you select directly impacts the quality, precision, and healing of your work.
This guide breaks down everything you need to know about tattoo needle types, configurations, and applications. You'll learn how to match needles to specific techniques and understand the relationship between needle choice and tattoo outcomes.
Understanding Tattoo Needle Basics
Before diving into specific needle types, it's important to grasp the fundamental components that define each needle.
Needle Anatomy and Terminology
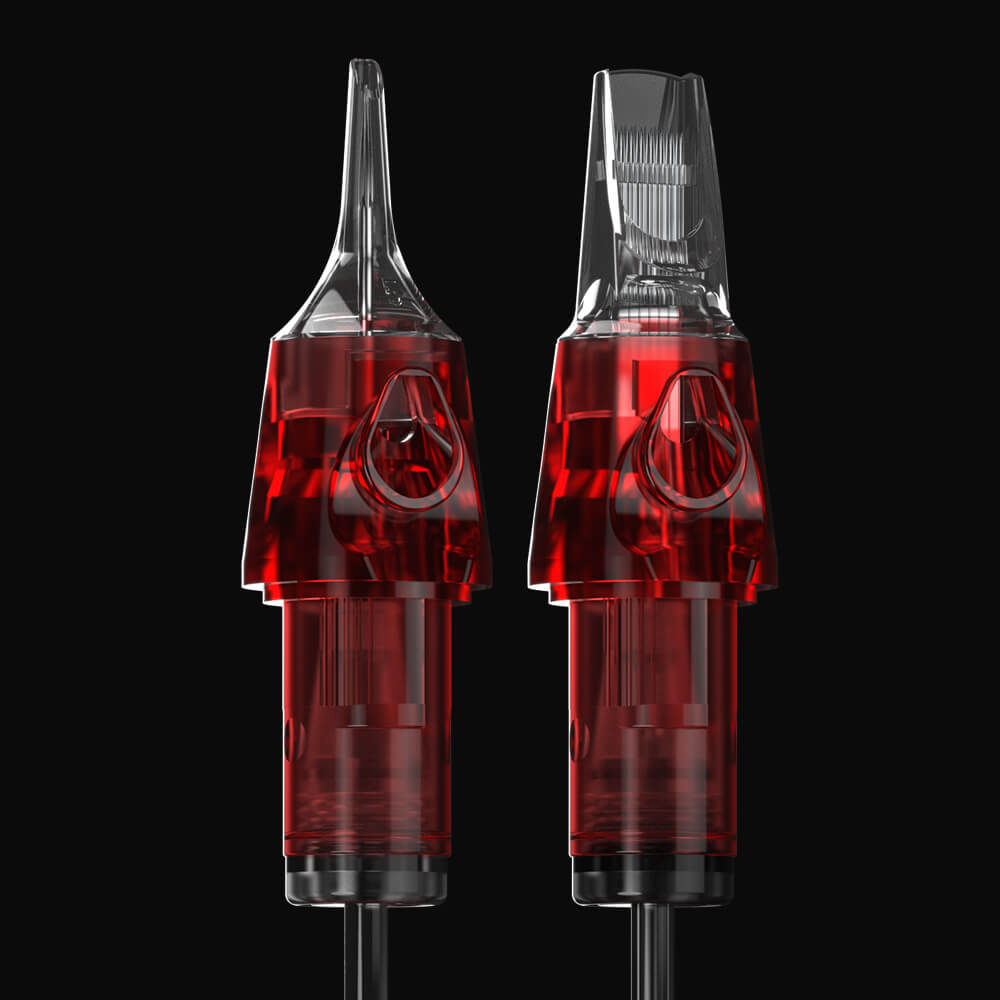
Tattoo needles consist of individual pins soldered together in specific patterns. The configuration determines how ink is deposited into the skin. Key terms include:
- Gauge: The thickness of individual needles (typically #10, #12, or #8)
- Taper: The length of the needle point, affecting how ink flows
- Configuration: The arrangement pattern of multiple needles
- Grouping: The number of needles in a single setup
Standard Needle Numbering System
Tattoo needles use a coding system that reveals their specifications at a glance. A typical code like “1207RL” breaks down as:
- 12: Gauge/diameter (#12 = 0.35mm diameter)
- 07: Number of needles in the grouping (7 needles)
- RL: Configuration type (Round Liner)
Understanding this system helps you quickly identify the right needle for any project.
Types of Tattoo Needle Configurations
Each needle configuration serves a distinct purpose and creates different effects in the skin.
Round Liner Needles (RL)
Round liners feature needles arranged in a tight circular pattern, creating the sharpest, most precise lines.
Best for:
- Crisp outlines and borders
- Fine line tattoos
- Lettering and script work
- Geometric designs requiring precision
- Technical details
Common sizes: 1RL to 14RL, with 3RL, 5RL, and 7RL being most popular for standard line work.
Smaller groupings (1RL-3RL) excel at delicate, thin lines, while larger groupings (9RL-14RL) create bold, thick outlines that hold up well over time.
Round Shader Needles (RS)
Round shaders have needles arranged in a looser circular configuration than liners, allowing more ink flow for softer effects.
Best for:
- Soft shading and gradients
- Color blending
- Portrait work requiring subtle transitions
- Dotwork and stippling techniques
- Creating depth and dimension
Common sizes: 3RS to 14RS, with 5RS and 7RS popular for general shading work.
The looser arrangement allows needles to move more independently, depositing ink in a softer, more diffused pattern than liners.
Magnum Needles (M1, M2)
Magnums feature needles arranged in two parallel rows, creating a flat configuration perfect for covering larger areas efficiently.
Best for:
- Smooth shading across large areas
- Color packing and saturation
- Background work
- Blending and soft transitions
- Realistic shading in portraits and nature scenes
Variations:
- Weaved Magnums (M1): Alternating needle positions for smoother blending
- Stacked Magnums (M2): Needles directly aligned for denser coverage
Most artists prefer M1 for soft shading and smooth blending, while M2 is preferred for dense color packing and high saturation.
Curved Magnum Needles (RM)
Curved magnums have the same two-row configuration as standard magnums but with a slight arc along the needle tips.
Best for:
- Following body contours naturally
- Reducing skin trauma during shading
- Smooth, even color application
- Soft gradients without harsh lines
- Working on curved surfaces like arms and legs
The curved design allows more needles to contact the skin simultaneously while reducing pressure points, making them gentler and more efficient for shading work.
Flat Needles (F)
Flat needles are arranged in a single straight line, offering a unique application method between liners and shaders.
Best for:
- Bold, solid lines
- Geometric patterns
- Thick outlines
- Color packing in linear areas
- Creating texture effects
Flats provide excellent control for straight lines and can cover more ground than round liners while maintaining definition.
Textured Needles (Bugpin)
#10 (0.30mm) or #8 (0.25mm), which are thinner than standard #12, allowing for more delicate work.
Best for:
- Hyperrealistic details
- Portraits requiring subtle gradations
- Tight color packing without trauma
- Delicate line work
- Intricate patterns in small spaces
The smaller diameter means less skin damage and faster healing, though they require more passes to achieve full saturation.
Choosing Needles for Specific Tattoo Techniques
Different tattoo styles demand specific needle choices to achieve their characteristic looks.
Lining Techniques
Fine line tattoos: Use 1RL to 3RL with a #12 gauge for delicate, minimalist designs. Single needle work requires a steady hand and slow, controlled movements.
Standard outlines: 5RL to 7RL create reliable, visible lines that define most traditional and neo-traditional tattoos.
Bold outlines: 9RL to 14RL or flat needles produce thick, strong lines that ensure the tattoo remains visible as it ages.
Technical details: 3RL to 5RL bugpin needles deliver precision for intricate patterns and small text.
Shading Techniques
Smooth gradients: Curved magnums (7RM to 11RM) excel at creating seamless transitions from dark to light.
Soft shading: Round shaders (5RS to 9RS) produce gentle, diffused effects perfect for portraits and realistic work.
Whip shading: Magnums (7M to 15M) with quick, sweeping motions create dramatic contrast and texture.
Black and grey work: Curved magnums in various sizes allow for the full range of values needed in monochromatic pieces.
Color Packing and Saturation
Solid color fill: Stacked magnums (M1) in larger groupings (11M to 15M) efficiently pack color into the skin.
Blended colors: Weaved magnums (M2) or curved magnums smooth color transitions without harsh edges.
Small color areas: Round shaders (5RS to 7RS) or small magnums (5M to 7M) offer control in tight spaces.
Vibrant saturation: Multiple passes with appropriately sized magnums ensure colors remain bright and saturated after healing.
Needle Size Selection Guide
Selecting the correct needle size depends on multiple factors working together.
Needle Diameter (Gauge)
- #12 (0.35mm): Standard size with balanced ink flow for most tattoo techniques.
- #10 (0.30mm): Thinner option for finer details and softer shading with less trauma.
- #8 (0.25mm): Ultra-thin diameter ideal for micro-line work and very gentle shading.
Thinner gauges heal faster but require more passes for saturation. Thicker gauges deposit more ink per pass but create more skin trauma.
Needle Taper Length
- Short taper (1.5mm): Precise control for lining and details
- Medium taper (2.0mm): Versatile for general work
- Long taper (3.5mm-4.5mm): Smooth ink flow for shading and color
Longer tapers allow easier ink flow and gentler application, while shorter tapers offer maximum precision and control.
Grouping Size Considerations
Small groupings (1-5 needles): Provide fine detail and precision but require more time for coverage.
Medium groupings (7-11 needles): Offer versatility for both detail work and moderate coverage.
Large groupings (13-23 needles): Cover large areas quickly but sacrifice some precision and increase skin trauma.
Match your grouping size to the scale of your work. Larger tattoos benefit from larger groupings, while small pieces demand smaller needle counts.
Matching Needles to Tattoo Styles
Different artistic styles have evolved alongside specific needle preferences.
Traditional and Neo-Traditional Tattoos
These bold styles rely on strong outlines and solid color packing:
- Outlines: 7RL to 11RL for thick, reliable lines
- Color packing: 9M1 to 13M1 for solid fills
- Shading: 7RS to 9RS for minimal shading elements
Realism and Portrait Work
Photorealistic tattoos demand subtle gradations and smooth transitions:
- Fine details: 3RL to 5RL bugpin for hair and texture
- Shading: 7RM to 11RM curved magnums for skin tones
- Highlights: 5RS for soft, luminous areas
- Background: 13RM to 15RM for large, smooth areas
Fine Line and Minimalist Tattoos
Delicate designs require precision without excess trauma:
- Primary lines: 1RL to 3RL with #12 or #10 gauge
- Slight shading: 3RS bugpin for subtle depth
- Dotwork: Single needle (1RL) for precise point placement
Japanese and Asian Traditional
These complex designs combine bold outlines with extensive shading:
- Outlines: 7RL to 9RL for defined borders
- Background shading: 11RM to 15RM for large gradients
- Detail work: 5RL for fine pattern elements
- Color work: 9M1 to 11M1 for saturated fills
Tribal and Blackwork
Solid black designs demand efficient ink packing:
- Bold outlines: 9RL to 14RL or flat needles
- Solid fills: 11M1 to 15M1 for dense black packing
- Large coverage: 15RM to 23RM for efficient filling
Needle Selection for Different Body Areas
Body placement affects needle choice due to varying skin thickness and sensitivity.
Sensitive Areas
Ribs, inner arms, neck, and hands have thinner skin requiring gentler approaches:
- Use smaller groupings (3RL-7RL, 5M-9M)
- Consider bugpin needles to reduce trauma
- Opt for curved magnums to distribute pressure
- Work with lighter hand pressure
Thick-Skinned Areas
Backs, thighs, and outer arms can handle more aggressive techniques:
- Larger groupings work efficiently (9RL-14RL, 11M-15M)
- Standard gauge needles penetrate adequately
- Bolder needle choices create lasting results
Curved Surfaces
Arms, legs, and cylindrical body parts benefit from needles that follow contours:
- Curved magnums naturally adapt to body shape
- Round shaders work well on rounded surfaces
- Adjust needle angle frequently during application
Practical Tips for Needle Selection
Quality and Safety Considerations
Always use sterile, single-use needles from reputable manufacturers. Pre-made cartridge needles offer consistency and safety advantages over traditional needle bars. Inspect needles before use for proper soldering and alignment.
Matching Needles to Machine Type
Rotary machines work well with all needle types but excel with longer tapers and curved magnums due to their smooth, gentle motion.
Coil machines traditionally pair with shorter tapers and round configurations, though modern coil machines handle any needle type effectively.
Pen-style machines accommodate cartridge needles exclusively and work efficiently with curved magnums and round shaders.
When to Switch Needles During a Session
Change needles when:
- Moving between lining and shading phases
- Switching from black to color work
- Needle performance degrades or feels dull
- Different effects require different configurations
- Contamination concerns arise
Most artists use separate needles for outlines, shading, and color packing within a single session.
Building Your Needle Inventory
Start with versatile sizes and expand based on your style:
Essential starter set:
- 3RL, 5RL, 7RL for varied line work
- 5RS, 7RS for basic shading
- 7M, 9M, 11M for general coverage
- 7RM, 9RM for smooth shading
Specialized additions:
- 1RL for fine line work
- 11RL-14RL for bold outlines
- Bugpin variations for detailed realism
- Larger magnums (13M-15M) for extensive color work
Common Mistakes to Avoid
Understanding what not to do helps you make better needle choices.
Using the Wrong Needle for the Technique
Attempting fine lines with large groupings or trying to fill large areas with small needles wastes time and compromises quality. Match your needle configuration to your intended effect.
Overworking the Skin
Using needles that are too large or aggressive for the area causes excessive trauma, leading to scarring, blowouts, and poor healing. When in doubt, choose a smaller, gentler option.
Ignoring Needle Wear
Needles dull quickly during use. A degraded needle creates ragged lines, inconsistent ink deposit, and increased skin damage. Change needles frequently throughout longer sessions.
Forcing Needles Beyond Their Purpose
Round liners aren't designed for shading large areas, and magnums can't create precise outlines. Using needles outside their intended application produces subpar results.
Conclusion
Choosing the right tattoo needle requires understanding how configuration, size, and taper affect ink deposition and skin impact. By matching needles to your specific technique, tattoo style, and body placement, you create cleaner lines, smoother shading, and more vibrant colors while minimizing client discomfort and healing issues.
Start with fundamental configurations and expand your inventory as your skills and style develop. Experiment with different needles on practice skin to understand how each performs before using them on clients. With experience, needle selection becomes intuitive, allowing you to focus on the artistry itself.
Remember that quality needles, proper technique, and appropriate selection work together to produce professional results. Invest time in learning how different needles perform, and your tattooing will improve dramatically.

