


Tattoo Needle Guide: How to Choose the Right Needle for Every Style and Technique
Choosing the wrong tattoo needle doesn't just slow you down — it can blow out lines, overwork skin, and produce results that look inconsistent once healed. Whether you're just starting out or trying to sharpen your technique, understanding needles is one of the most important foundations of tattooing.
This guide breaks down every needle type you'll encounter: how to read needle codes, when to use each configuration, which gauges work best for black and gray versus color, and how taper affects your results. By the end, you'll know exactly which needle to reach for — no matter what style you're tattooing.
How to Read Tattoo Needle Codes
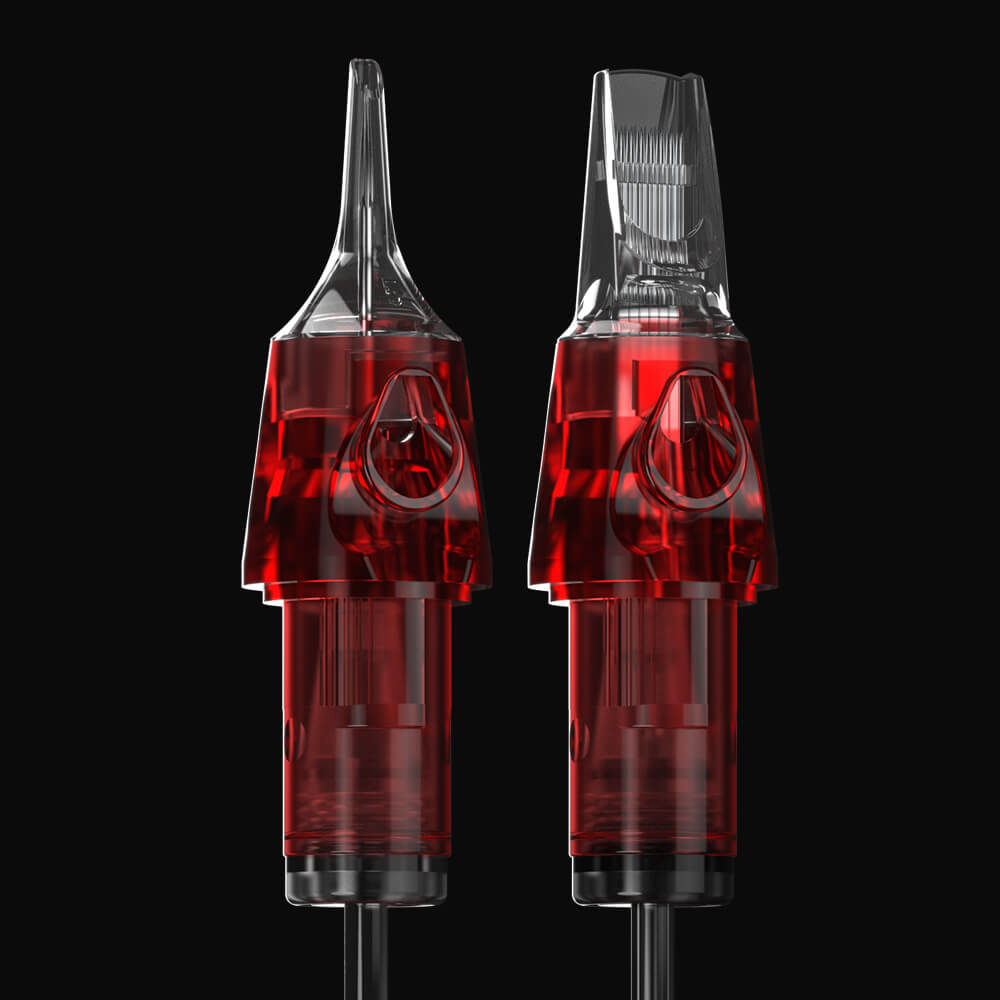
Every box of tattoo needles comes with a sticker or label that tells you exactly what's inside. Once you know how to decode it, you'll never feel lost at the supply wall again.
Gauge (Needle Thickness)
The first number in a needle code is the gauge, which refers to the diameter of each individual sharp. The most common gauges you'll encounter are:
- 12 gauge — standard thickness, the most widely used
- 10 gauge — thinner sharps, often called “bugpins” in the industry
- 8 gauge — ultra-thin, used primarily for fine line work
The thicker the gauge, the bigger the hole it punches into the skin, which means faster ink saturation. Thinner gauges create smaller punctures, allowing you to build tones gradually with multiple passes.
Needle Count
After the gauge, the next number tells you how many individual sharps are grouped together. A code like 1207RL means it's a 12-gauge needle with 7 sharps in a round liner configuration.
Configuration Type
The letters at the end of the code indicate the needle's formation — essentially, its shape and intended purpose. The main configurations you'll use regularly are:
- RL (Round Liner) — tightly grouped sharps for crisp lines
- RS (Round Shader) — slightly spread sharps for shading in tight areas
- M1 / M2 (Magnum) — two staggered rows for shading and packing large areas
- CM / SEM (Curved Magnum) — arc-shaped magnum for soft blends and smoother skin contact
Taper
Taper refers to how long and sharp the point of each needle is. If a box doesn't list the taper, you can assume it's medium taper — the standard. Longer tapers allow for finer, more precise marks. Shorter tapers are blunter and push more ink quickly.
Liner Needles: When and How to Use Them
Small Liners (1, 3, and 5 Round Liners)
Small liners are your precision tools. Use them for:
- Fine line work and delicate script
- Stippling and dot work
- Intricate realism details
- Thin line weights in neotraditional tattoos
A 3 round liner is generally preferred over a 1 round liner for most fine work. The single sharp of a 1RL carries very little ink on its own, making it harder to get consistent saturation. A 3RL holds ink between the grouped sharps, giving you a more controlled deposit.
If you need something even thinner than a standard 3RL, try an 8-gauge or 6-gauge 3 — the ultra-thin diameter makes the needle nearly as fine as a 1RL, but with better ink flow.
One important caution: fine liners cut through skin easily and blow out fast if you're not careful. Practice your hand speed and pressure before committing to ultra-thin needle work on clients.
Medium Liners (7 and 9 Round Liners)
7 and 9 round liners are workhorses. For scripts, symbols and small flash, these will be your most-reached-for needles. They're versatile enough to pack small areas of color in a pinch, so you won't always need to switch to a shader just to fill gaps in a small lettering piece.
These sizes also work well for stippling on medium-to-large designs, where a fine liner would take too long to cover the ground.
Large Liners (11, 14, and Above)
Big liner needles are reserved for large-scale work: American traditional, tribal, sleeves, and back pieces where bold, thick lines are part of the style.
Keep two things in mind with large liners:
- Lines spread as they heal. A tattoo done with a 14RL today will look noticeably thicker in a few years. Many experienced traditional artists deliberately work with 9s or 11s to leave room for that natural expansion, rather than starting too heavy.
- They demand machine power. Cheap machines will struggle to push large liners through skin consistently. You'll want a machine running a 4mm stroke or above for any liner bigger than a 5.
Tight Round Liners
A tight round liner has its sharps pinched closer together than a standard RL. This reduces streaking in lines and gives the needle a smaller effective footprint — a tight 9RL performs closer in size to a standard 7RL. These are worth experimenting with once you have solid fundamentals, but not essential for beginners.
Round Shaders: Lining, Filling, and Texture
A round shader (RS) uses the same circular grouping as a round liner, but the soldering point is set further back. This allows the sharps to splay open slightly, which changes how the needle behaves in skin.
What Round Shaders Are Best For
- Shading tight, intricate areas where a mag is too bulky
- Filling small kanji, symbols, and walk-in flash
- Creating texture and depth in detailed work
- Packing highlights in color realism
A 7RS behaves roughly like a 9RL in terms of line width — it gives you a thicker line from a smaller grouping, which can mean less trauma and a potentially better heal.
Can You Line With a Round Shader?
Yes — but with trade-offs. Lines pulled with a round shader will often show small gaps or streaks immediately after tattooing. Don't panic: these close up naturally as the tattoo heals. The upside is that round shaders are gentler on skin and less prone to blowouts because the sharps aren't as tightly concentrated. The downside is reduced precision — following a stencil line is harder when the needle tip is more spread out.
Magnum Needles: Shading and Packing at Scale
Magnums are your go-to for filling large areas, building gradients, and packing in solid color. Understanding the differences between magnum types will give you much more control over your results.
Curved Magnum vs. Straight Magnum
A curved magnum (CM/SEM) has its sharps arranged on a slight arc rather than a flat line. This arc follows the natural contour of skin, meaning it sits more gently against the surface and causes less trauma at the edges.
A straight magnum has harder edges that can cut skin more aggressively, especially when working around curves. While straight mags offer slightly better performance for flat solid fills, most experienced artists prefer curved mags for their versatility — with enough practice, a curved mag can do everything a straight mag can, and more.
For soft backgrounds, smooth fades, and blended shading, curved mags are the clear choice. For hard-edged solid fills, you can use the corner of a curved mag to achieve the same effect.
M1 vs. M2 Configuration
- M1 — needles are weaved loosely, with larger gaps between sharps. Better for beginners; gentler on skin while still allowing good saturation.
- M2 — needles are packed tightly together. Saturates ink very quickly, but causes significantly more skin trauma. Not recommended for beginners.
Choosing Magnum Size
Larger mags (23, 45, and above) produce smoother, more consistent gradients over big areas, but require more machine power and more precise, even strokes to avoid patchiness. Smaller mags (9, 15) are easier to maneuver in tight areas and penetrate the skin with less resistance — useful for intricate designs with lots of small sections.
For most tattooers starting out, a 9CM, 15CM, and 23CM in 10 gauge will cover the majority of situations you'll encounter.
Massive Mags (45+)
Configurations like the 45 mag and above — including the extreme 123-sharp curved magnum — exist primarily for blacking out large areas fast. These require specialized grip hardware and exceptionally powerful machines. Unless you're regularly doing full blackout sleeves or back pieces, these won't be part of your everyday toolkit.
Needle Taper: Short, Medium, and Long
Taper controls how the needle point tapers from tip to full diameter.
| Taper | Best For |
|---|---|
| Long taper | Fine line work, precision lining, color blending and realism |
| Medium taper | All-purpose use; the default assumption if not labeled |
| Short taper | Fast ink packing, solid black traditional work, tribal, areas where visible dot texture is intentional |
For color realism, long taper needles allow you to adjust depth to shift between delicate blends (shallow) and solid fills (deeper), all with the same needle.
For bold traditional or tribal work where the heavy dot texture is part of the aesthetic, short taper needles deliver that characteristic look efficiently.
Needle Recommendations by Tattoo Style
Realism and Black & Gray
- Small liners (3RL, 5RL) for fine details and hair strokes
- Round shaders (5RS, 7RS) for tight shading
- Curved mags (9CM, 15CM, 23CM) in 10 gauge for building tones
- Long taper needles for smooth transitions
Color Realism
- 12 gauge curved mags with long taper for smooth color blends
- Round shaders for intricate color packing in small areas
- Gray lining (thin liner + light gray wash) to mark out shapes before shading
American Traditional
- 9RL or 11RL for outlines (leaving room for line spread over time)
- Larger curved mags for solid color fills
- 12 gauge needles for efficient color saturation
Neotraditional
- 3RL for the thinnest line weight
- 7RL or 9RL for heavier outline contrast
- Curved mags for smooth shading transitions
Fine Line
- 3RL, 8-gauge or 6-gauge 3RL for ultra-thin lines
- Slow, controlled hand speed to avoid blowouts
- Long taper needles for maximum precision
Tribal and Solid Black
- Large liners (11RL, 14RL) for bold outlines
- Straight or curved large mags for fast solid fill
- Short taper needles where heavy dot texture is part of the aesthetic
Final Thoughts
Tattoo needles aren't just a commodity — they're the direct interface between your technique and the skin. Understanding gauge, count, configuration, and taper gives you the vocabulary to make intentional choices rather than guessing. The best needle is always the one that matches your style, your client's skin, and the specific effect you're trying to achieve.
Start simple, build experience, and let your needle selection grow alongside your skills.

