


How to Tattoo Clean Lines: The Complete Guide for Beginners and Improving Artists
Introduction
In tattooing, everything starts with the line. Whether you're creating a bold traditional piece or a delicate fine-line design, the quality of your linework determines how the entire tattoo reads — both freshly done and years down the road. Yet for many beginners and even intermediate artists, achieving consistently clean, saturated lines remains one of the most frustrating challenges in the craft.
If your lines are healing patchy, looking too faint right after the session, or causing unnecessary trauma to the skin, something in your technique needs adjusting. The good news? These problems almost always trace back to three controllable variables: hand speed, needle depth, and machine voltage. Master these, and your linework will transform.
This guide breaks down each factor in detail — along with equipment considerations, machine grip, curve techniques, and how to fix lines that didn't go in quite right the first time.
The Three Core Factors That Determine Linework Quality
Before diving into specifics, it's worth understanding how these three elements interact:
Hand Speed
Hand speed refers to the pace at which you move the machine across the skin. Move too fast and the ink won't saturate properly, leaving thin or broken lines. Move too slow and you risk overworking the tissue, causing unnecessary damage and potential scarring.
Needle Depth
Depth determines how far the needle penetrates into the dermis. Too shallow and the ink won't anchor — it heals out completely. Too deep and you risk blowouts or cutting through layers of skin entirely.
Machine Voltage
Voltage controls the power and speed of the needle stroke. Running too low can result in weak ink deposit; too high paired with slow movement can be destructive. Finding your ideal voltage is part of developing your personal tattooing style.
These three factors don't operate in isolation — they must be calibrated together. A slight change in one requires a corresponding adjustment in the others.
Choosing the Right Tattooing Supplies
Before troubleshooting your technique, it's worth ruling out equipment as the culprit.
Why Needle Quality Matters
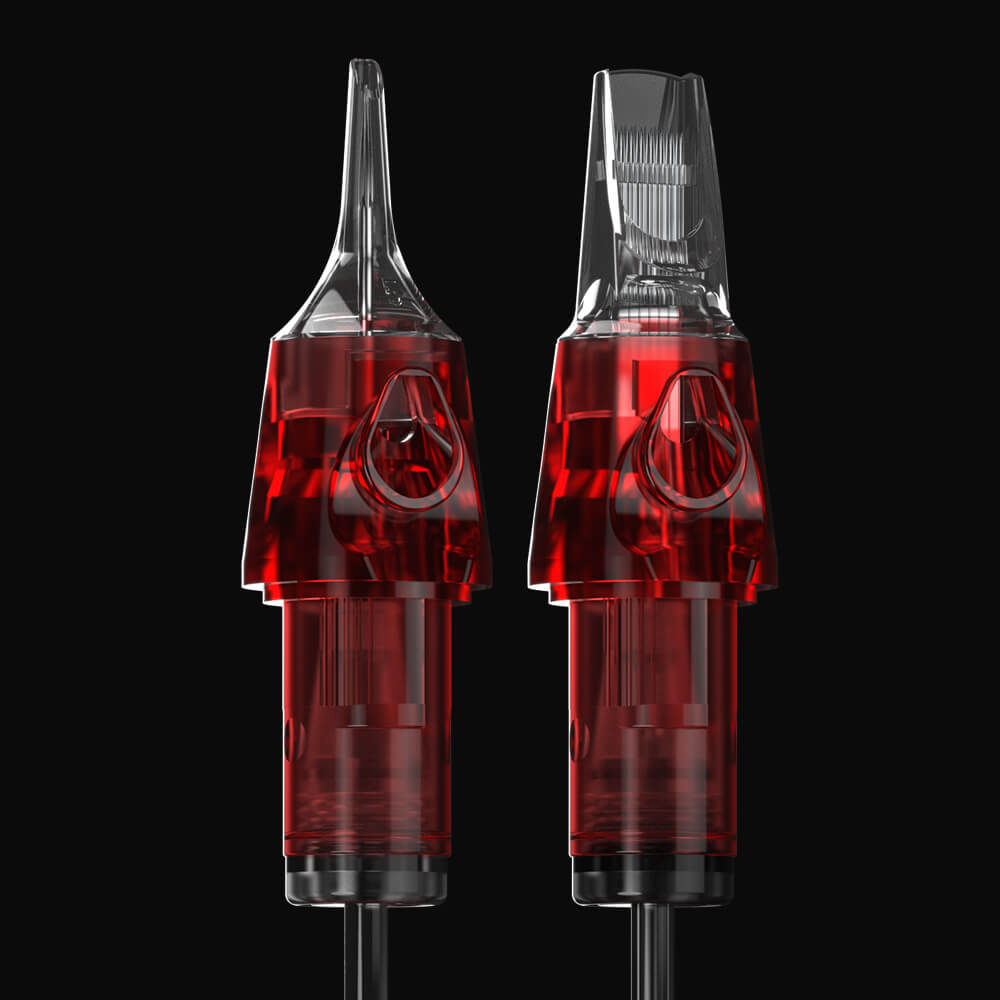
Not all cartridges are created equal. Lower-quality cartridges often have inconsistent needle groupings, which can lead to uneven lines with a jagged or scratchy appearance. The ink flow from the reservoir to the needle tip may also be unreliable, causing gaps in saturation mid-stroke — problems that are easy to misattribute to an unsteady hand.
What to Look For
Investing in reputable, professional-grade cartridges is one of the simplest ways to eliminate variables. Many artists who have made the switch to CNC Police Tattoo Cartridges find them a reliable staple in their everyday workflow — the needle groupings are precisely aligned, ink flow is consistently smooth, and whether you're pulling lines or building shading, the performance is predictable stroke after stroke. When you're working with equipment you can trust, any issues that do arise are much easier to trace back to technique rather than your tools. Consistent needle alignment and reliable ink delivery make a meaningful difference, especially when you're still in the process of building muscle memory.
Needle Depth Explained
Getting your needle depth right is arguably the most technically demanding aspect of clean linework — and the most common source of problems.
Tattooing Off the Needle Tip vs. the Tube
There are two general approaches to machine positioning: riding on the tube (where the tube itself contacts the skin) and working off the needle tip (where only the protruding needle makes contact). Working from the needle tip gives you far greater tactile feedback and depth control. It allows you to feel the skin's resistance and adjust on the fly, rather than relying on the tube as a guide.
As you gain confidence, transitioning to needle-tip tattooing will give you noticeably more precision and reduce the risk of pushing ink too far beneath the skin's surface.
The Consequences of Going Too Shallow
When the needle barely grazes the upper layers of skin, the ink deposits in an inconsistent pattern. You might be able to see small individual dots or gaps within what should be a solid line. These shallow deposits rarely survive the healing process — the tattoo can fade significantly or vanish in patches entirely, requiring a touch-up session.
The Consequences of Going Too Deep
On the other end of the spectrum, excessive needle depth causes serious problems. When the needle penetrates too deeply, ink spreads laterally beneath the skin, creating blurry, blown-out edges around the line. In extreme cases — particularly when combined with very slow hand movement — the repeated needle strikes can actually slice through the skin tissue, causing trauma that's both painful and slow to heal.
Finding the Right Depth
The correct depth sits in a precise zone within the dermis, just below the epidermis. Visually, a well-placed line looks clean and consistent immediately after tattooing, without excessive redness or raised skin. Developing this feel takes practice — working on synthetic practice skins is invaluable for training your hand to recognize the right resistance.
Hand Speed Control Techniques
Consistent hand speed is what separates professional-looking linework from amateur results. Even if your depth and voltage are dialed in, erratic pacing will undermine everything.
Matching Hand Speed to Voltage
Your hand speed and machine voltage need to work in harmony. Higher voltage means the needle is striking faster, which allows for quicker movement across the skin. Lower voltage requires a slower, more deliberate pace to ensure proper ink deposit. Finding your personal sweet spot — the combination where lines go in solid without trauma — is a matter of deliberate experimentation.
Moving Too Slowly: The Hidden Danger
Many beginners assume that slowing down gives them more control and accuracy. While a slightly reduced pace can help in tricky areas, going too slow is genuinely harmful. The needle strikes the same patch of skin repeatedly, breaking down tissue, causing excessive bleeding, and often producing lines that look thick and blown out rather than crisp.
Moving Too Fast: The Saturation Problem
Speed is the more common mistake among newer artists who feel nervous or excited. When your hand outpaces the machine's ability to deposit ink, you end up with faint, translucent lines that look correct in the moment but heal out poorly. The line appears unfinished, even immediately after tattooing.
Building Consistency Through Practice
One of the hardest habits to develop is maintaining the same pace from the start of a line to its finish. Many artists unconsciously speed up as they relax into a session, leading to uneven saturation across a single stroke. Practicing repetitive line exercises on fake skin — straight lines, curves, and continuous strokes — helps build the muscle memory needed to maintain a steady, controlled pace throughout a full tattoo.
Voltage Settings: Finding Your Range
Every artist develops their own preferred voltage range, influenced by their machine, their needle choice, and their tattooing style.
Recommended Starting Range
A commonly effective range for linework sits between 9 and 10.5 volts, though this varies depending on the machine. This range provides enough power to drive the needle cleanly through the skin while still giving the artist meaningful control. Lower voltages, around 7–8 volts, are often more appropriate for shading, where a softer touch is needed.
Shading vs. Lining Voltage
Lining typically demands higher voltage than shading because the goal is a clean, decisive ink deposit in a single pass. Shading involves building gradients gradually, so a softer, lower-power approach prevents over-saturation. Knowing when and how to switch your settings between these two tasks is part of developing a well-rounded technical foundation.
Machine Differences Matter
Not all tattoo machines respond identically to the same voltage. Rotary machines, coil machines, and different brands within those categories each have their own "feel" at a given power setting. Understanding your specific machine's behavior — how it responds, how it sounds, how the needle stroke feels — is part of the learning process that no guide can fully replace. Take time to get familiar with your equipment on practice skin before working on clients.
Machine Grip and Angle
How you physically hold the machine has a direct impact on depth control, line consistency, and fatigue over long sessions.
Using Your Middle Finger for Control
Positioning your middle finger beneath the cartridge creates a stable support point that helps absorb minor hand tremors. This contact point gives you fine-tuned control over the machine's movement, especially during detail work where precision matters most.
Using the Pinky as a Depth Anchor
One of the most practical grip techniques is using your pinky finger as a depth reference. By resting your pinky lightly on the skin while tattooing, you create a consistent distance between the machine and the surface. Over time, this becomes muscle memory — your hand naturally replicates the same angle and depth on every stroke without conscious thought.
Optimal Machine Angle
The angle at which you hold the machine relative to the skin affects how the needle enters and moves through the dermis. A roughly 80-degree angle — nearly upright but slightly tilted in the direction of movement — works well for most linework scenarios. Holding the machine completely vertical can make depth harder to control, while a low angle risks dragging the needle and producing inconsistent lines.
Adjusting for Needle Size
Thicker needle groupings (such as larger magnums or round liners) may require slight angle adjustments to ensure full ink saturation. A slightly more tilted approach can help larger groupings deposit ink evenly rather than creating uneven pressure across the needle cluster.
Handling Curves and Circular Lines
Straight lines are one thing — navigating curves, arcs, and circular elements introduces a new set of challenges that catch many artists off guard.
Pushing vs. Pulling Lines
Artists generally have a preference for either pushing (moving the needle in the direction of the stroke) or pulling (dragging it behind). Pushing lines tends to allow better visibility of where the needle is heading, which can improve accuracy. Experiment with both approaches to discover which produces cleaner results with your specific grip and machine setup.
Breaking Down Complex Curves
When a curve becomes too tight or awkward to execute in a single fluid motion, it's perfectly acceptable — and often preferable — to break it into segments. Attempting to force your hand through an uncomfortable angle often results in wobbly lines or inconsistent pressure. Stopping partway, repositioning, and continuing from a slight overlap keeps the line visually continuous without sacrificing quality.
When you reach a section of a curve where continuing would compromise your stability — perhaps because the angle becomes awkward — one effective approach is to deliberately flick or "whip" the needle out of the skin at that point, ending the stroke cleanly. You then reposition and restart the line slightly before the endpoint, blending back into the existing stroke. Done correctly, this creates a seamless continuation without bumps, blobs, or over-saturated overlap points.
Fixing Lines That Didn't Go In Correctly
Even experienced artists occasionally need to revisit a section of linework. Knowing how to correct a light or uneven line without causing further damage is an essential skill.
Resist the Urge to Over-Compensate
The instinctive reaction to a faint line is to go back over it harder and faster, essentially trying to force the ink in. This approach almost always makes things worse. Aggressive repeat passes cause swelling and trauma, making it difficult to see what you're doing and increasing the likelihood of blowouts or scarring.
The Correct Approach to Touch-Ups
When a line needs correction, approach it with the same controlled depth you'd use on fresh skin — or even slightly shallower to account for the skin already being worked. Reduce your hand speed slightly compared to your initial pass; the skin is already partially open, so the ink deposits more readily. The goal is to fill in gaps without adding unnecessary trauma to the surrounding tissue.
The Hardest Part: Tracing Your Own Line
The technical challenge of touching up linework isn't the depth or speed — it's precision. Following the exact path of an existing line, without drifting to one side and creating a double-line effect, requires a steady hand and careful focus. Practicing this on fake skin — intentionally making a light line and then correcting it — is one of the best preparation exercises for real-world tattooing scenarios.
Daily Practice Recommendations
Consistent improvement in linework comes from deliberate, focused practice rather than simply tattooing more frequently.
The Value of Straight-Line Drills
Practicing straight lines on synthetic skin might seem overly basic, but it's one of the fastest ways to develop the mechanical consistency that clean tattooing requires. These exercises build the muscle memory for maintaining even pressure, stable speed, and consistent depth — the same fundamentals that apply to every tattoo you'll ever do.
Using Comparison to Measure Progress
One of the most effective self-coaching techniques is to tattoo a row of lines on practice skin over multiple sessions, deliberately varying one element at a time — speed, voltage, depth — and comparing the results side by side. Seeing the physical difference between a line made at the right speed versus one made too quickly or slowly creates clear, immediate feedback that accelerates learning far more than abstract instruction alone.
Keeping Ink Flow Consistent
A practical tip that's easy to overlook: make sure your cartridge has sufficient ink before beginning each stroke. If you run out of ink mid-line, the result will be a faded or broken section that may need correction. Dipping the needle tip into ink between strokes ensures a consistent reservoir and helps you achieve fully saturated lines from start to finish.
Conclusion
Clean tattoo linework is not the product of a single trick or secret setting — it's the result of understanding how hand speed, needle depth, and voltage interact, and developing the muscle memory to apply that understanding consistently under real working conditions.
Start by ensuring your equipment is reliable. From there, focus on building feel for the correct needle depth — neither too timid nor too aggressive. Develop a steady, deliberate hand speed that matches your voltage, and use your grip and pinky anchor to maintain consistent depth throughout every stroke. When curves arise, don't fight through discomfort; segment the line and use the whip-out technique to maintain quality at every point. And when a line needs fixing, approach it calmly and precisely rather than reactively.
Above all, practice with intention. Every session on synthetic skin is an opportunity to refine one element of your technique. Progress in tattooing is cumulative — and the artists who put in focused, deliberate practice on the fundamentals are the ones whose linework stands out for all the right reasons.

